How to Film Migrating Sandhill Cranes at Dusk Without Spooking Them
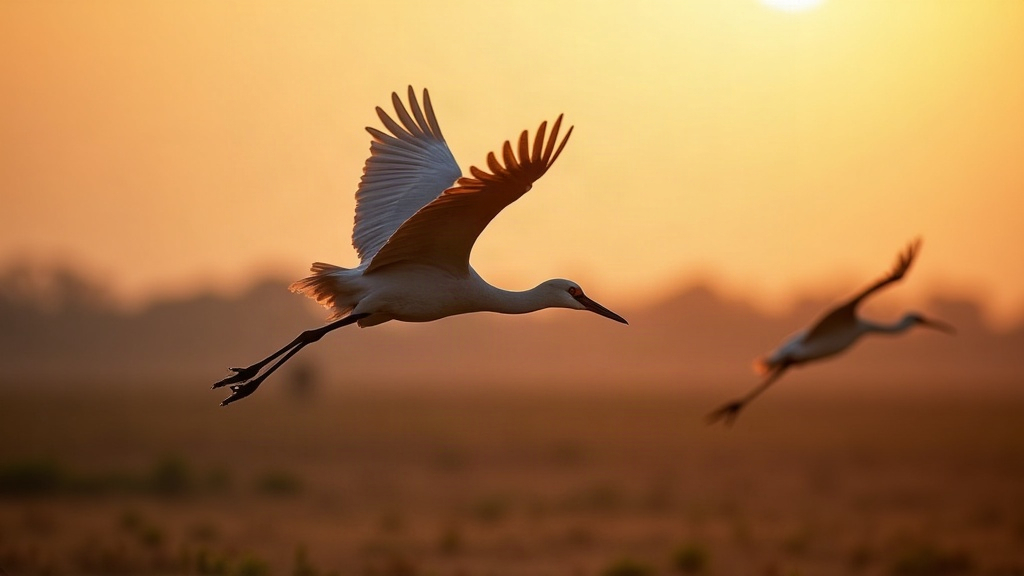
Filming Sandhill Cranes at Dusk: A Field Guide for Low-Disturbance Videography
Filming migrating sandhill cranes at dusk is one of the most rewarding challenges in wildlife videography. It’s also one of the easiest ways to blow the whole shoot in about four seconds flat, because if you rush the approach, you can scatter an entire roosting flock before you’ve even pulled the lens cap off. This guide walks through the setup, timing, and field behavior that let you capture cinematic footage of cranes settling in for the night without sending them airborne in a panic.
Why Dusk Is the Golden Window
Sandhill cranes typically arrive at their roosting sites (shallow riverbeds, wetlands, sandbars) in the hour before and after sunset. This “fly-in” period is where the magic happens: silhouettes against orange skies, synchronized wingbeats, that eerie, rattling call that makes crane migration so instantly recognizable on film. But low light comes with a price:
- Slower shutter speeds, which amplify the effects of camera shake and subject movement
- Reduced visibility, making it harder to judge your real distance from the flock
- Heightened wariness in the birds themselves, since cranes get more cautious as darkness falls and predators start getting active
Choosing the Right Location and Timing
Scout during daylight first. Always. Known staging areas like Nebraska’s Platte River or New Mexico’s Bosque del Apache can pull in tens of thousands of cranes during peak migration, usually mid-March and again in November. Go at midday and look for:
- Existing blinds, levees, or elevated viewing platforms
- Natural cover such as reeds, cottonwoods, or riverbank contours
- The flight path the cranes actually use to approach the roost
Then get there at least 90 minutes before sunset. Cranes often circle and call for quite a while before committing to land, so you want to be settled, quiet, and basically invisible long before the first birds touch water.
Gear Setup for Low-Light Filming
A handful of equipment choices make a real difference here:
- Fast lenses (f/2.8 or wider) pull in more light without forcing your ISO through the roof
- A sturdy tripod with a fluid head keeps your pans smooth as birds glide in
- Image stabilization, on both body and lens, saves handheld shots as the light fades fast
- A monopod as backup, for when you need to reposition quickly without breaking down a full tripod
- Neutral or camouflage gear covers to cut down on silhouette and movement
Push your ISO higher than you’d like, somewhere in the 1600-6400 range depending on your sensor, and favor shutter speed over clean noise levels. A grainy but sharp clip beats a smooth, blurry mess every time.
Approach and Behavior: The Non-Negotiables
The single biggest mistake newcomers make is treating the approach like a casual hike to a nice viewpoint. Cranes are acutely tuned in to:
- Silhouettes on the horizon, so stay low, use natural cover, and never stand on an open ridgeline
- Sudden movement, which means your blind or position needs to be set up at least 30 minutes before the first birds arrive
- Noise, and that includes car doors slamming, loud talking, or gear clattering anywhere near the roost
- Direct eye contact and pointed objects, since a long lens aimed straight at a bird can read as predator behavior; approach at an angle, never head-on
A permanent or portable blind is, hands down, the single most effective tool for getting close without causing a disturbance. Many refuges, Bosque del Apache included, keep fixed blinds specifically for this. Use them whenever you can instead of winging it with your own setup.
Reading Flock Behavior
Watch for the warning signs that you’re too close, too visible, or just too much:
- Necks stretching upward, bodies freezing (this is the “alert posture”, and it’s your cue)
- A spike in calling, or a few birds suddenly getting fidgety
- A ripple effect as birds start drifting away from your position
See any of that? Stop moving. Completely. Give it a few minutes and the flock will often settle right back down if you hold still. If the agitation keeps building instead, retreat slowly. Never push forward.
Post-Processing Considerations
Low-light footage usually needs a gentle nudge in post, nothing drastic:
- Apply noise reduction with a light hand so you don’t lose feather detail
- Lift shadows selectively instead of flattening the whole frame
- Warm up the white balance a touch to match that natural dusk palette
Final Thoughts
Filming sandhill cranes at dusk rewards patience and discipline far more than it rewards expensive gear. Scout early, set up well before the flight begins, lean on blinds and natural cover, and keep reading the flock’s body language the entire time you’re out there. Get it right, and you’ll walk away with footage that captures the full drama of migration, without ever disturbing the birds that made the shot possible in the first place.